
Getting started with BearPDF
BearPDF runs in your browser, so there’s nothing to install. Open bearpdf.bearwoodlabs.com and you can start right away in demo mode.
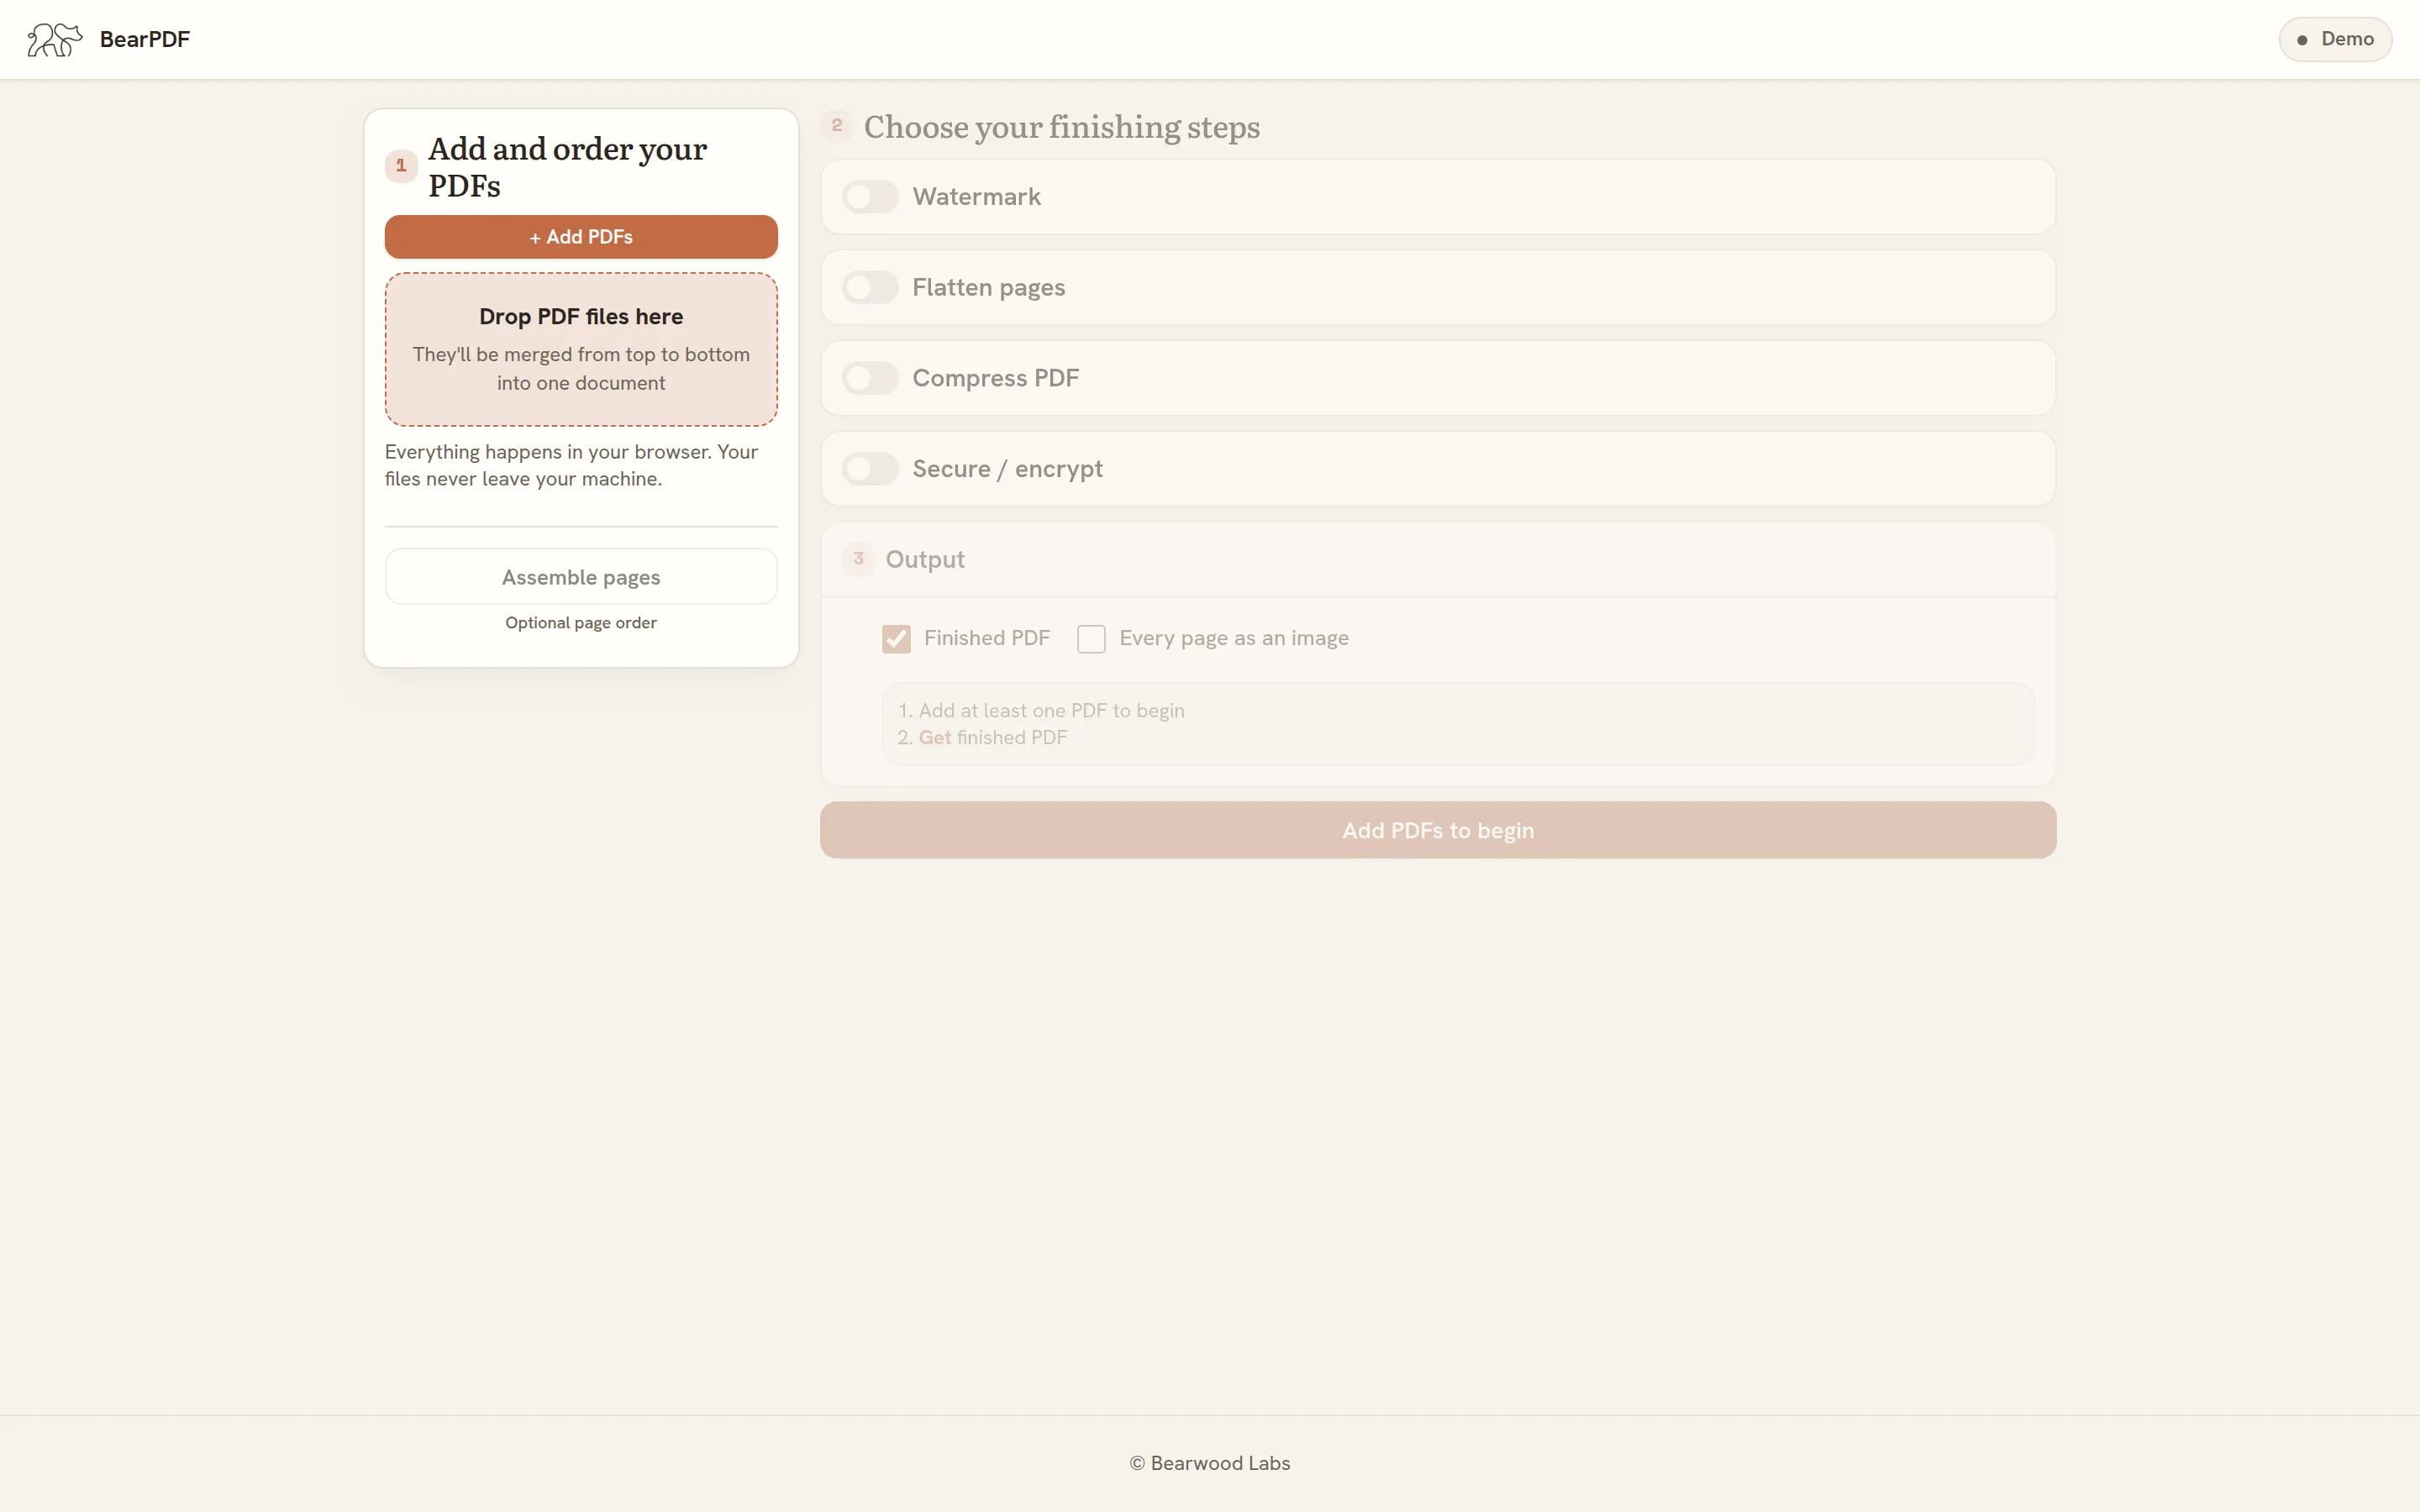
1. Add and order your PDFs
Section titled “1. Add and order your PDFs”- Click + Add PDFs, or drag files onto the drop zone.
- Files are merged top to bottom into one document, in the order they’re listed. Use the up/down arrows on a file row to reorder, or the ✕ to remove one.
Everything happens in your browser, and your files never leave your machine.
2. Optional: organise or split pages
Section titled “2. Optional: organise or split pages”If you need finer control than reordering whole files, click Organise pages. This opens a page-thumbnail grid spanning every file you’ve added.
- Drag pages to reorder them, rotate individual pages, or remove ones you don’t want.
- To create separate PDFs, click + Split after the page where each PDF should end. The following page starts the next PDF. To make one PDF per page, add a split after every page. You can give each PDF its own filename.
- Click Apply page plan to lock in your changes, or Reset all to go back to the natural order.
3. Choose your finishing steps
Section titled “3. Choose your finishing steps”Each step below is a toggle, so turn on only the ones you need. BearPDF shows a running pipeline summary as you enable steps, so you can see exactly what will happen before you run it.
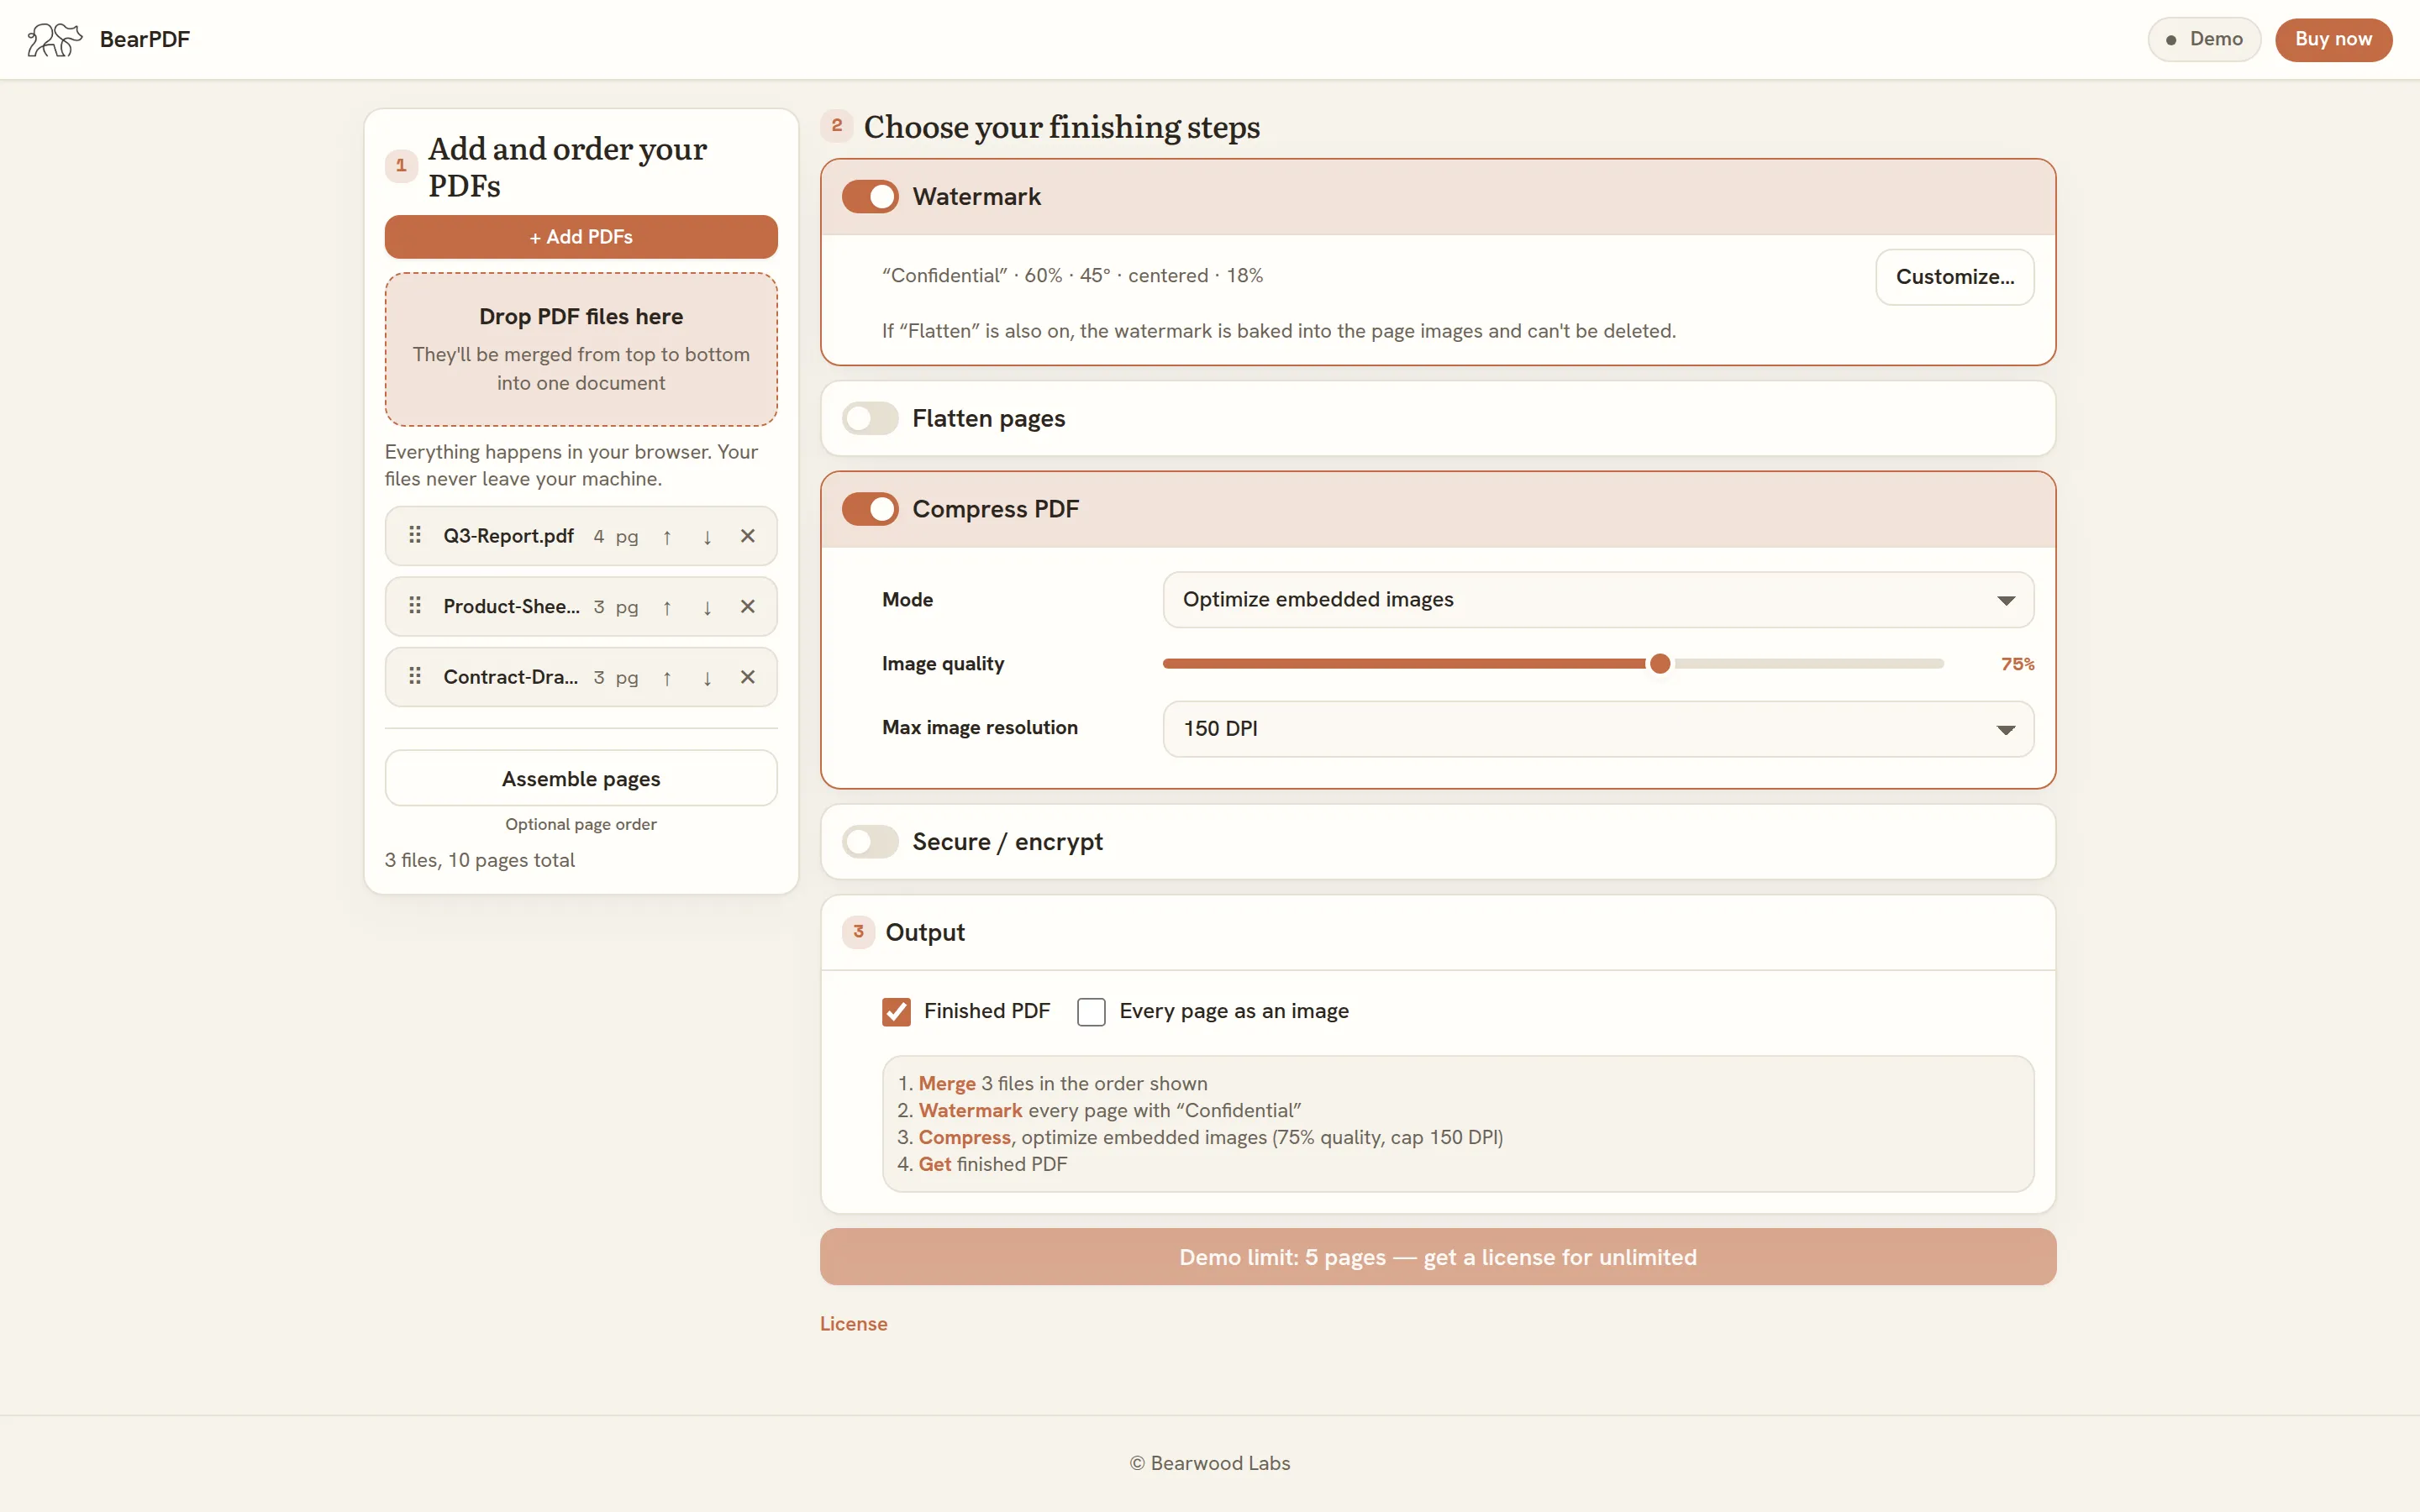
Watermark
Section titled “Watermark”Turn this on to stamp text or a logo image on your pages. The step card shows a short summary of the current settings and a Customize… button. Click it to open the full watermark editor: settings on the left, a live preview of a real page from your document on the right, so you see exactly where the mark lands before you run anything.
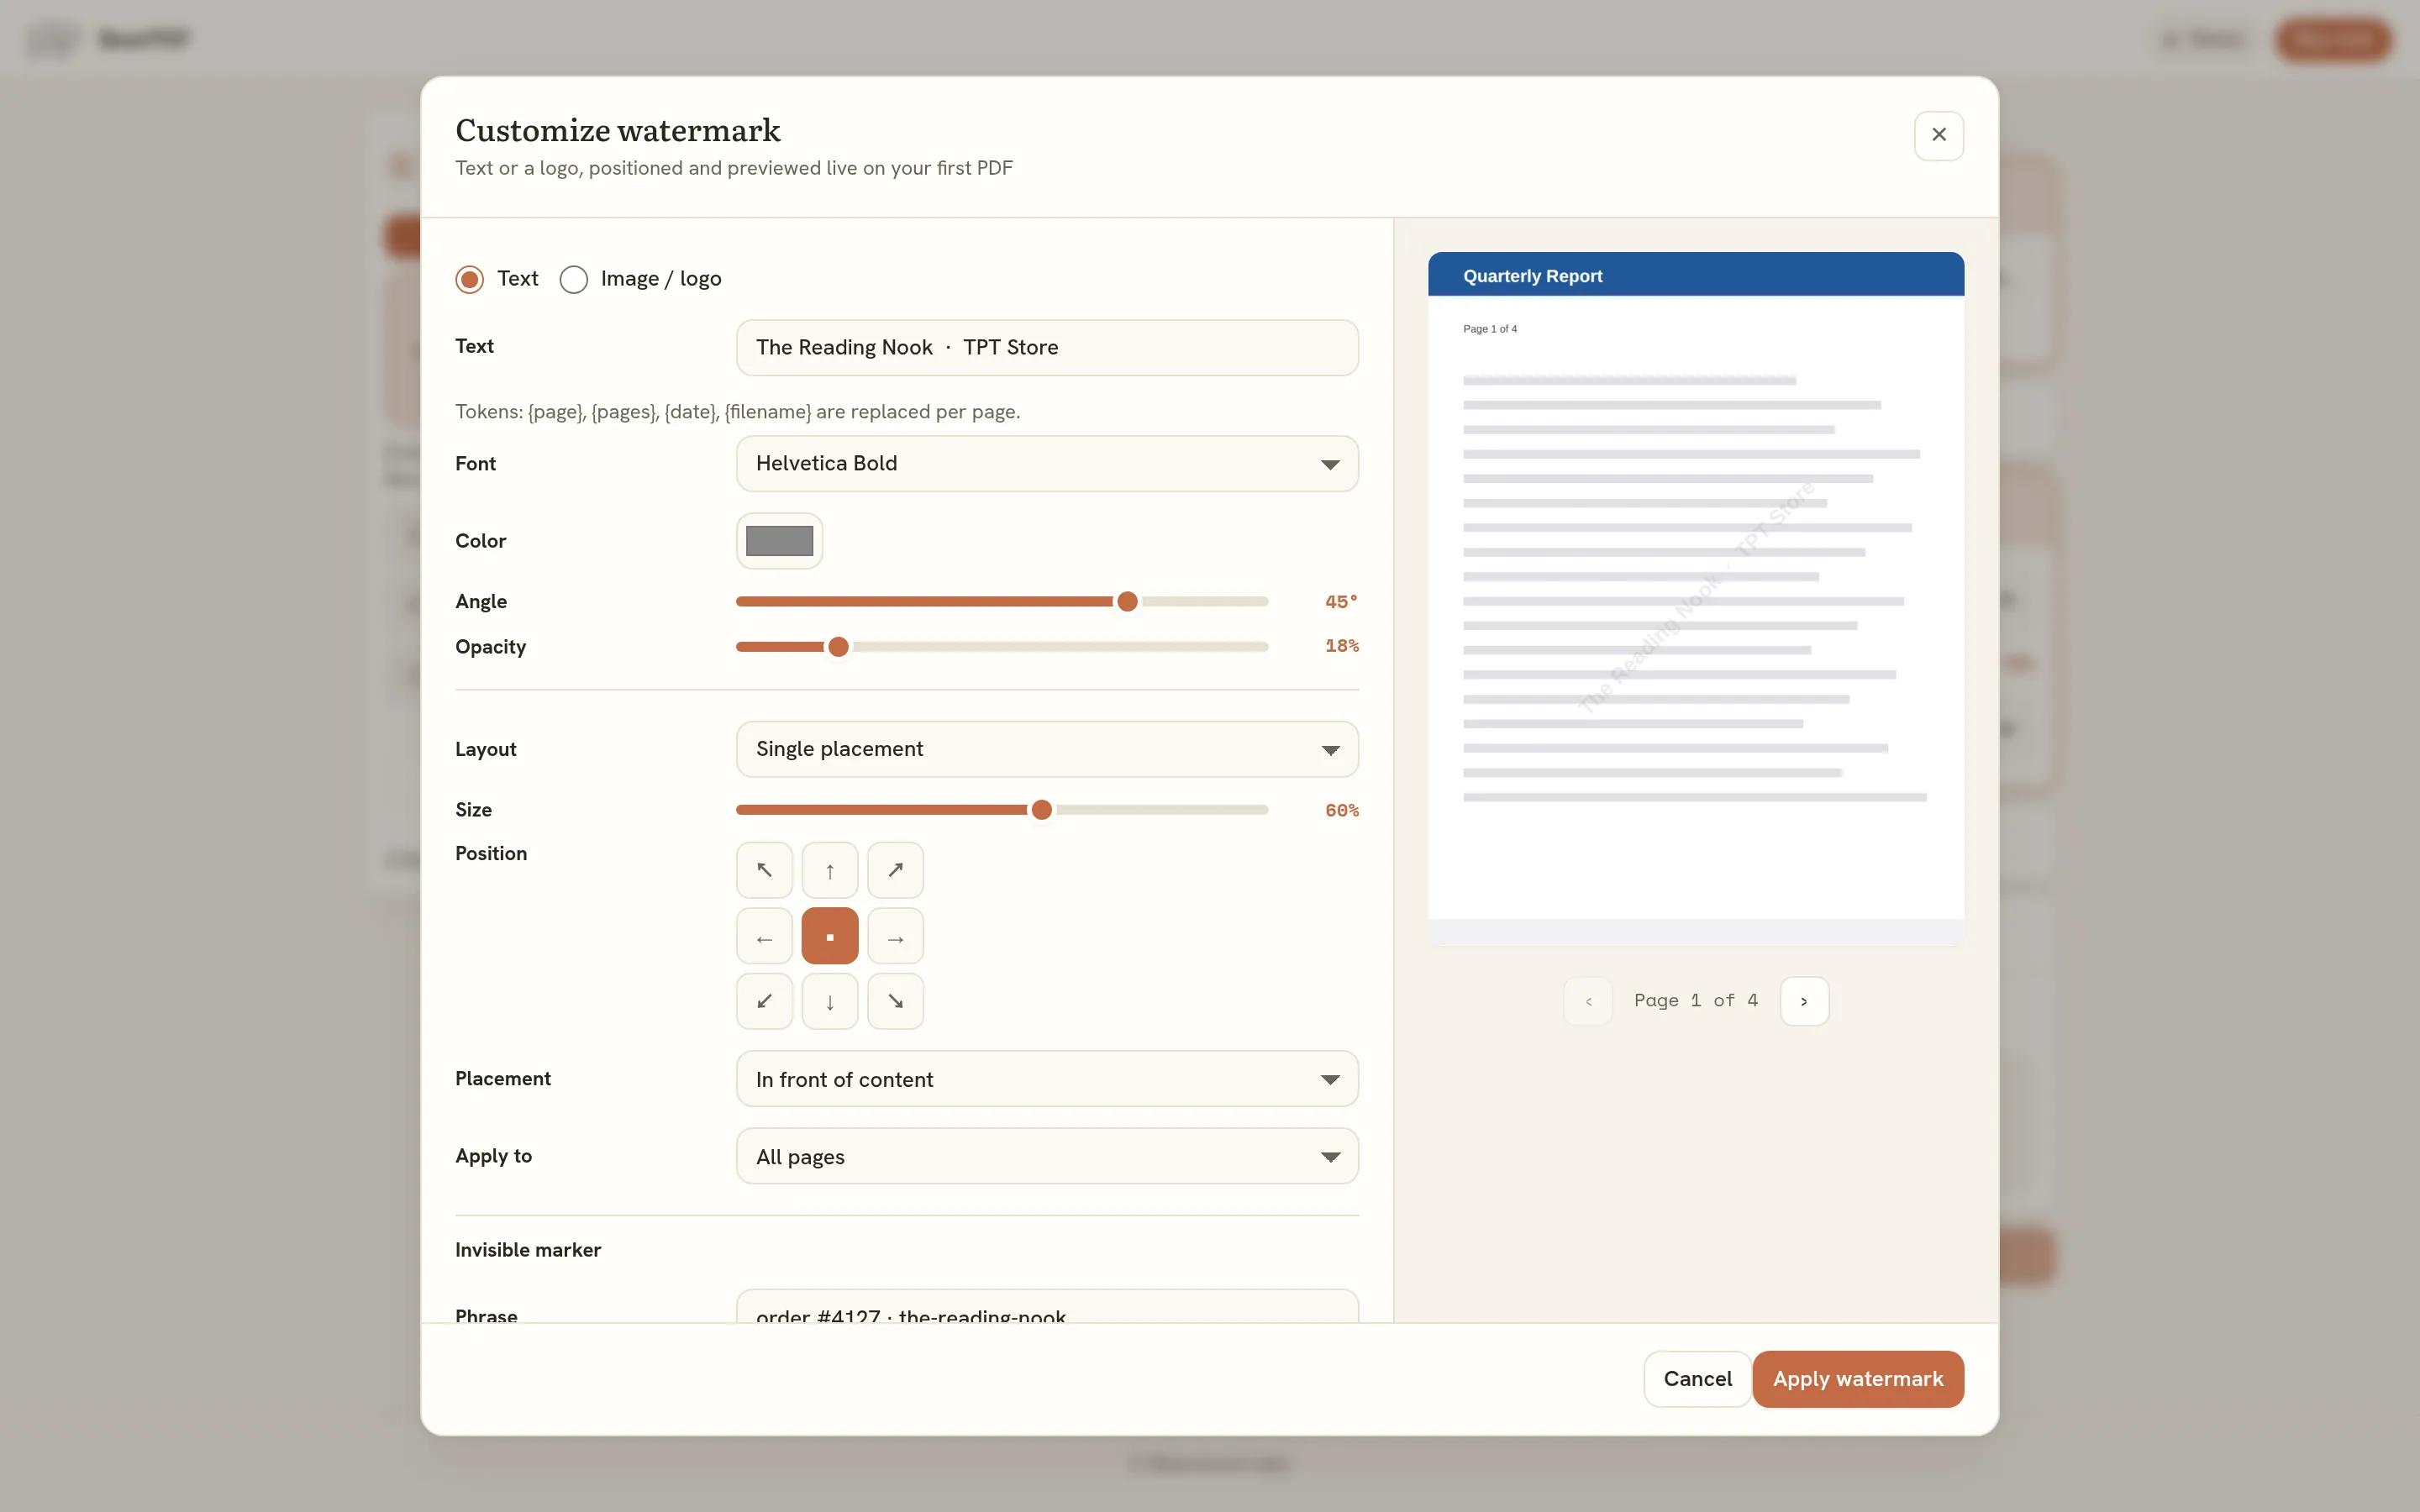
Pick Text or Image / logo. In text mode you type the text and set the font (Helvetica, Times, or Courier, regular or bold), color, angle from -90 to 90 degrees, and opacity. Your text can include tokens that fill in per page: {page}, {pages}, {date}, and {filename}. So Page {page} of {pages} or Proof for {filename} becomes real values on each page. In logo mode you upload a PNG or JPG and set its width, opacity, and angle.
For layout you can place the mark once in any of nine spots (the four corners, the four edge midpoints, or the center), or tile it across the whole page with spacing you control. A size control sets how much of the page width the mark takes up. You can draw it over the page, or under the page content so the text underneath stays readable.
The page range presets let you apply the watermark to all pages, the first page only, every page except the first, or a custom range like 1,3-5.
Watermarking runs before flattening, so if Flatten is also on, the mark gets baked into the page images and cannot be pulled back out.
Invisible marker
Section titled “Invisible marker”Below the visible watermark settings there is an Invisible marker field. Type a phrase here, for example an order code, a buyer’s name, or something like sold-by-yourstore-2026. It supports the same tokens as the visible text: {page}, {pages}, {date}, and {filename}.
BearPDF embeds that phrase into the text layer of every page. You cannot see it: the page looks pixel identical to before, with no visible mark. But the phrase is really in the file’s text, so the PDF can be searched for it later. Select all and copy the text out, or use find, and the phrase is there.
This is handy for proving a leaked or reshared copy came from you. If you drop a buyer’s order code into each copy you send, and one of those files turns up somewhere it should not, you can search it and trace it back to the buyer who received it. Leave the field empty to skip it.
Flatten pages
Section titled “Flatten pages”Turn this on to re-render every page as an image rather than leaving it as live text and vector content. BearPDF picks the best encoding per page automatically (indexed-palette for clipart and text-heavy pages, PNG or JPEG for everything else), so pages stay sharp where it matters and small everywhere else.
Use this when you want a document that can’t easily be edited, text copied, or a watermark removed. Hyperlinks in the original PDF are kept by default. Turn off Keep hyperlinks if you’d rather drop them.
Compress PDF
Section titled “Compress PDF”Turn this on to shrink the finished file size. Choose a mode:
- Optimize embedded images: re-encodes oversized photos down to a chosen quality and maximum DPI.
- Optimize PDF structure only: tidies the file without touching image quality.
Use this for files with large embedded photos, or just to trim overall file size before sharing.
Secure / encrypt
Section titled “Secure / encrypt”Turn this on to lock down the finished PDF with AES encryption.
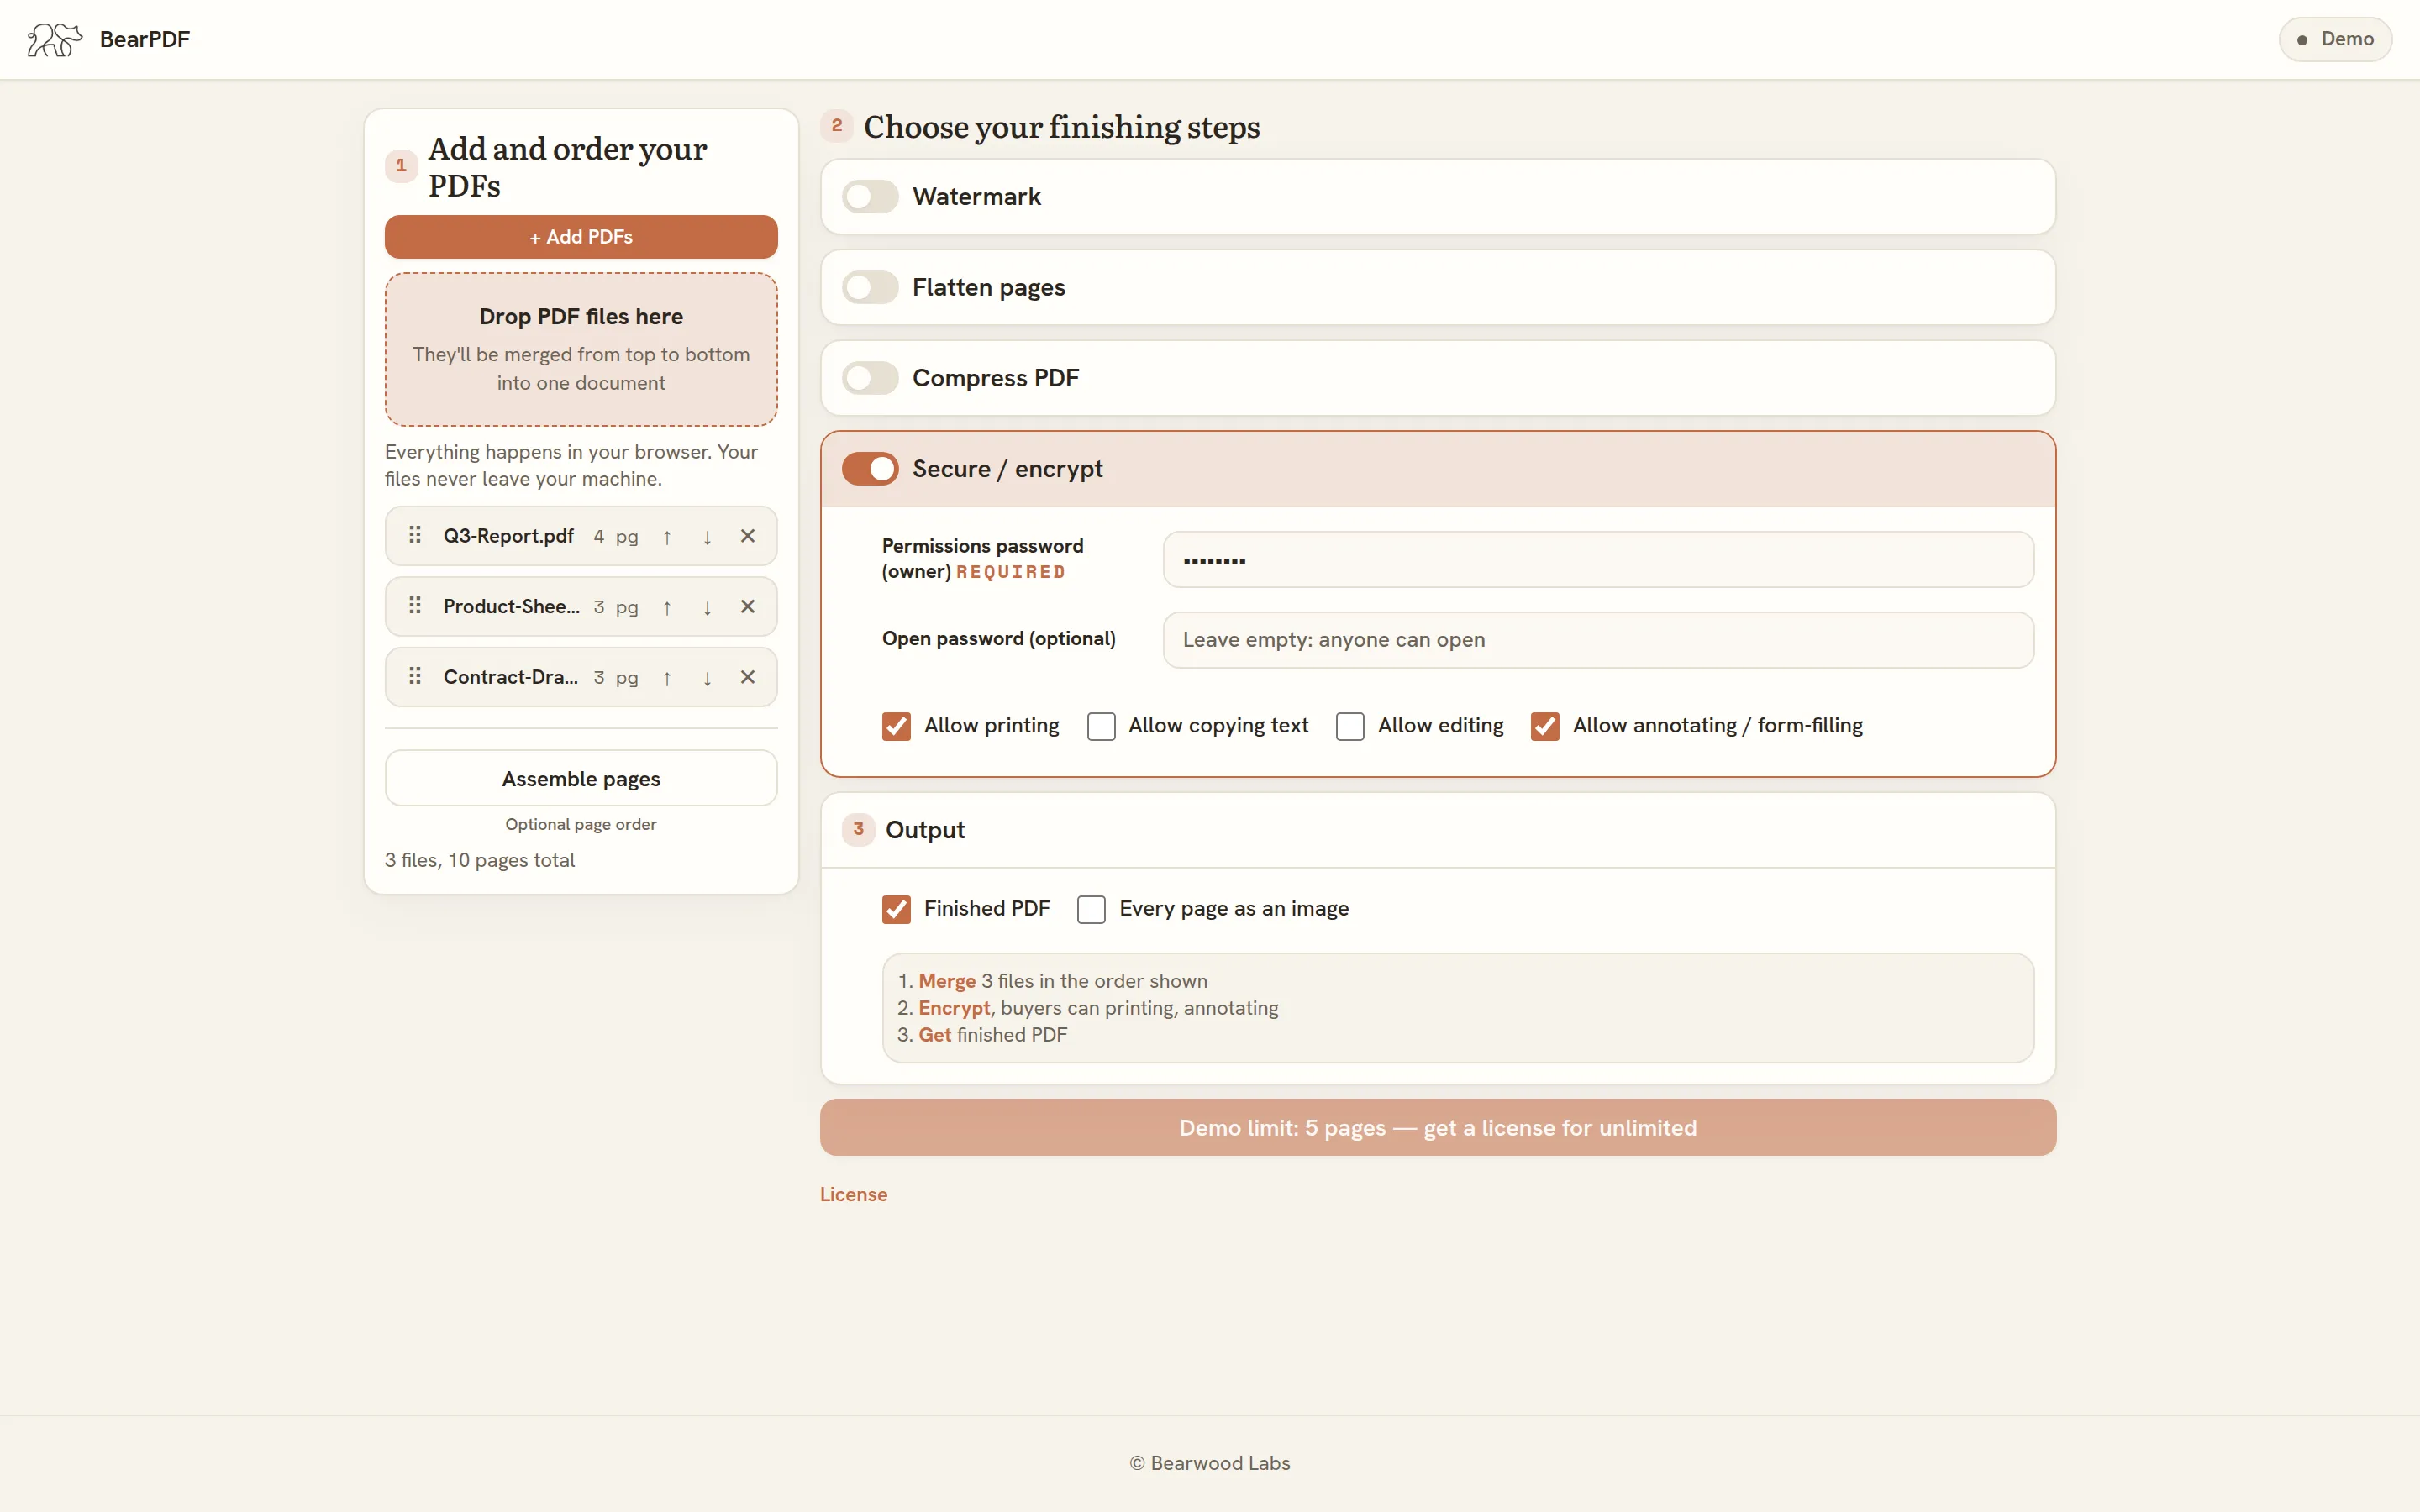
- Permissions password (owner): required. This is the password that controls the permissions below, so keep it to yourself.
- Open password: optional. Leave it empty and anyone can open the file, or set it to require a password just to open it.
- Permissions: checkboxes for allowing printing, copying text, editing, and annotating/form-filling.
Use this when you’re distributing a file and want to restrict what people can do with it, for example allowing printing and annotating but not copying or editing.
4. Choose your output
Section titled “4. Choose your output”Under Output, pick what the pipeline should produce:
- Finished PDF: the merged, finished document.
- Every page as an image: export each page as a PNG or JPEG at your chosen resolution, alongside or instead of the PDF.
5. Run the pipeline
Section titled “5. Run the pipeline”Click Run pipeline. A progress overlay tracks each step as it runs, then shows your results with a summary and download links.